How to Build a Raised Flower Bed
Constructing a beautiful garden may seem like a daunting task, but really all it takes is a few tools and materials, a small space, and a few hours of your time to be able to enjoy years of fresh vegetables and colorful flowers all to yourself. We’re going to be building a standard garden bed with wood; however you may also use pavers, blocks, or stone for this small project. Be advised that if you are to be planting vegetables in your raised flower bed, do not use treated wood because the chemicals will leach into your garden. We recommend using cedar wood because it looks great and resists decay! Whatever you decide to use, just make sure you have at least 6” of soil for the plants roots to grow.

Tools Needed:
- Tape measure
- Rafter square tool
- Drill with bits & screw-driving bits
- Work gloves
- Shovel & garden hoe
- Level tool
- Utility knife
- Soaker hose
- Wheelbarrow (optional)
Materials Needed:
- 2x4s & 4x4s*
- Box of 3-inch deck screws
- Landscape fabric
- Soil & Compost
- Fertilizer
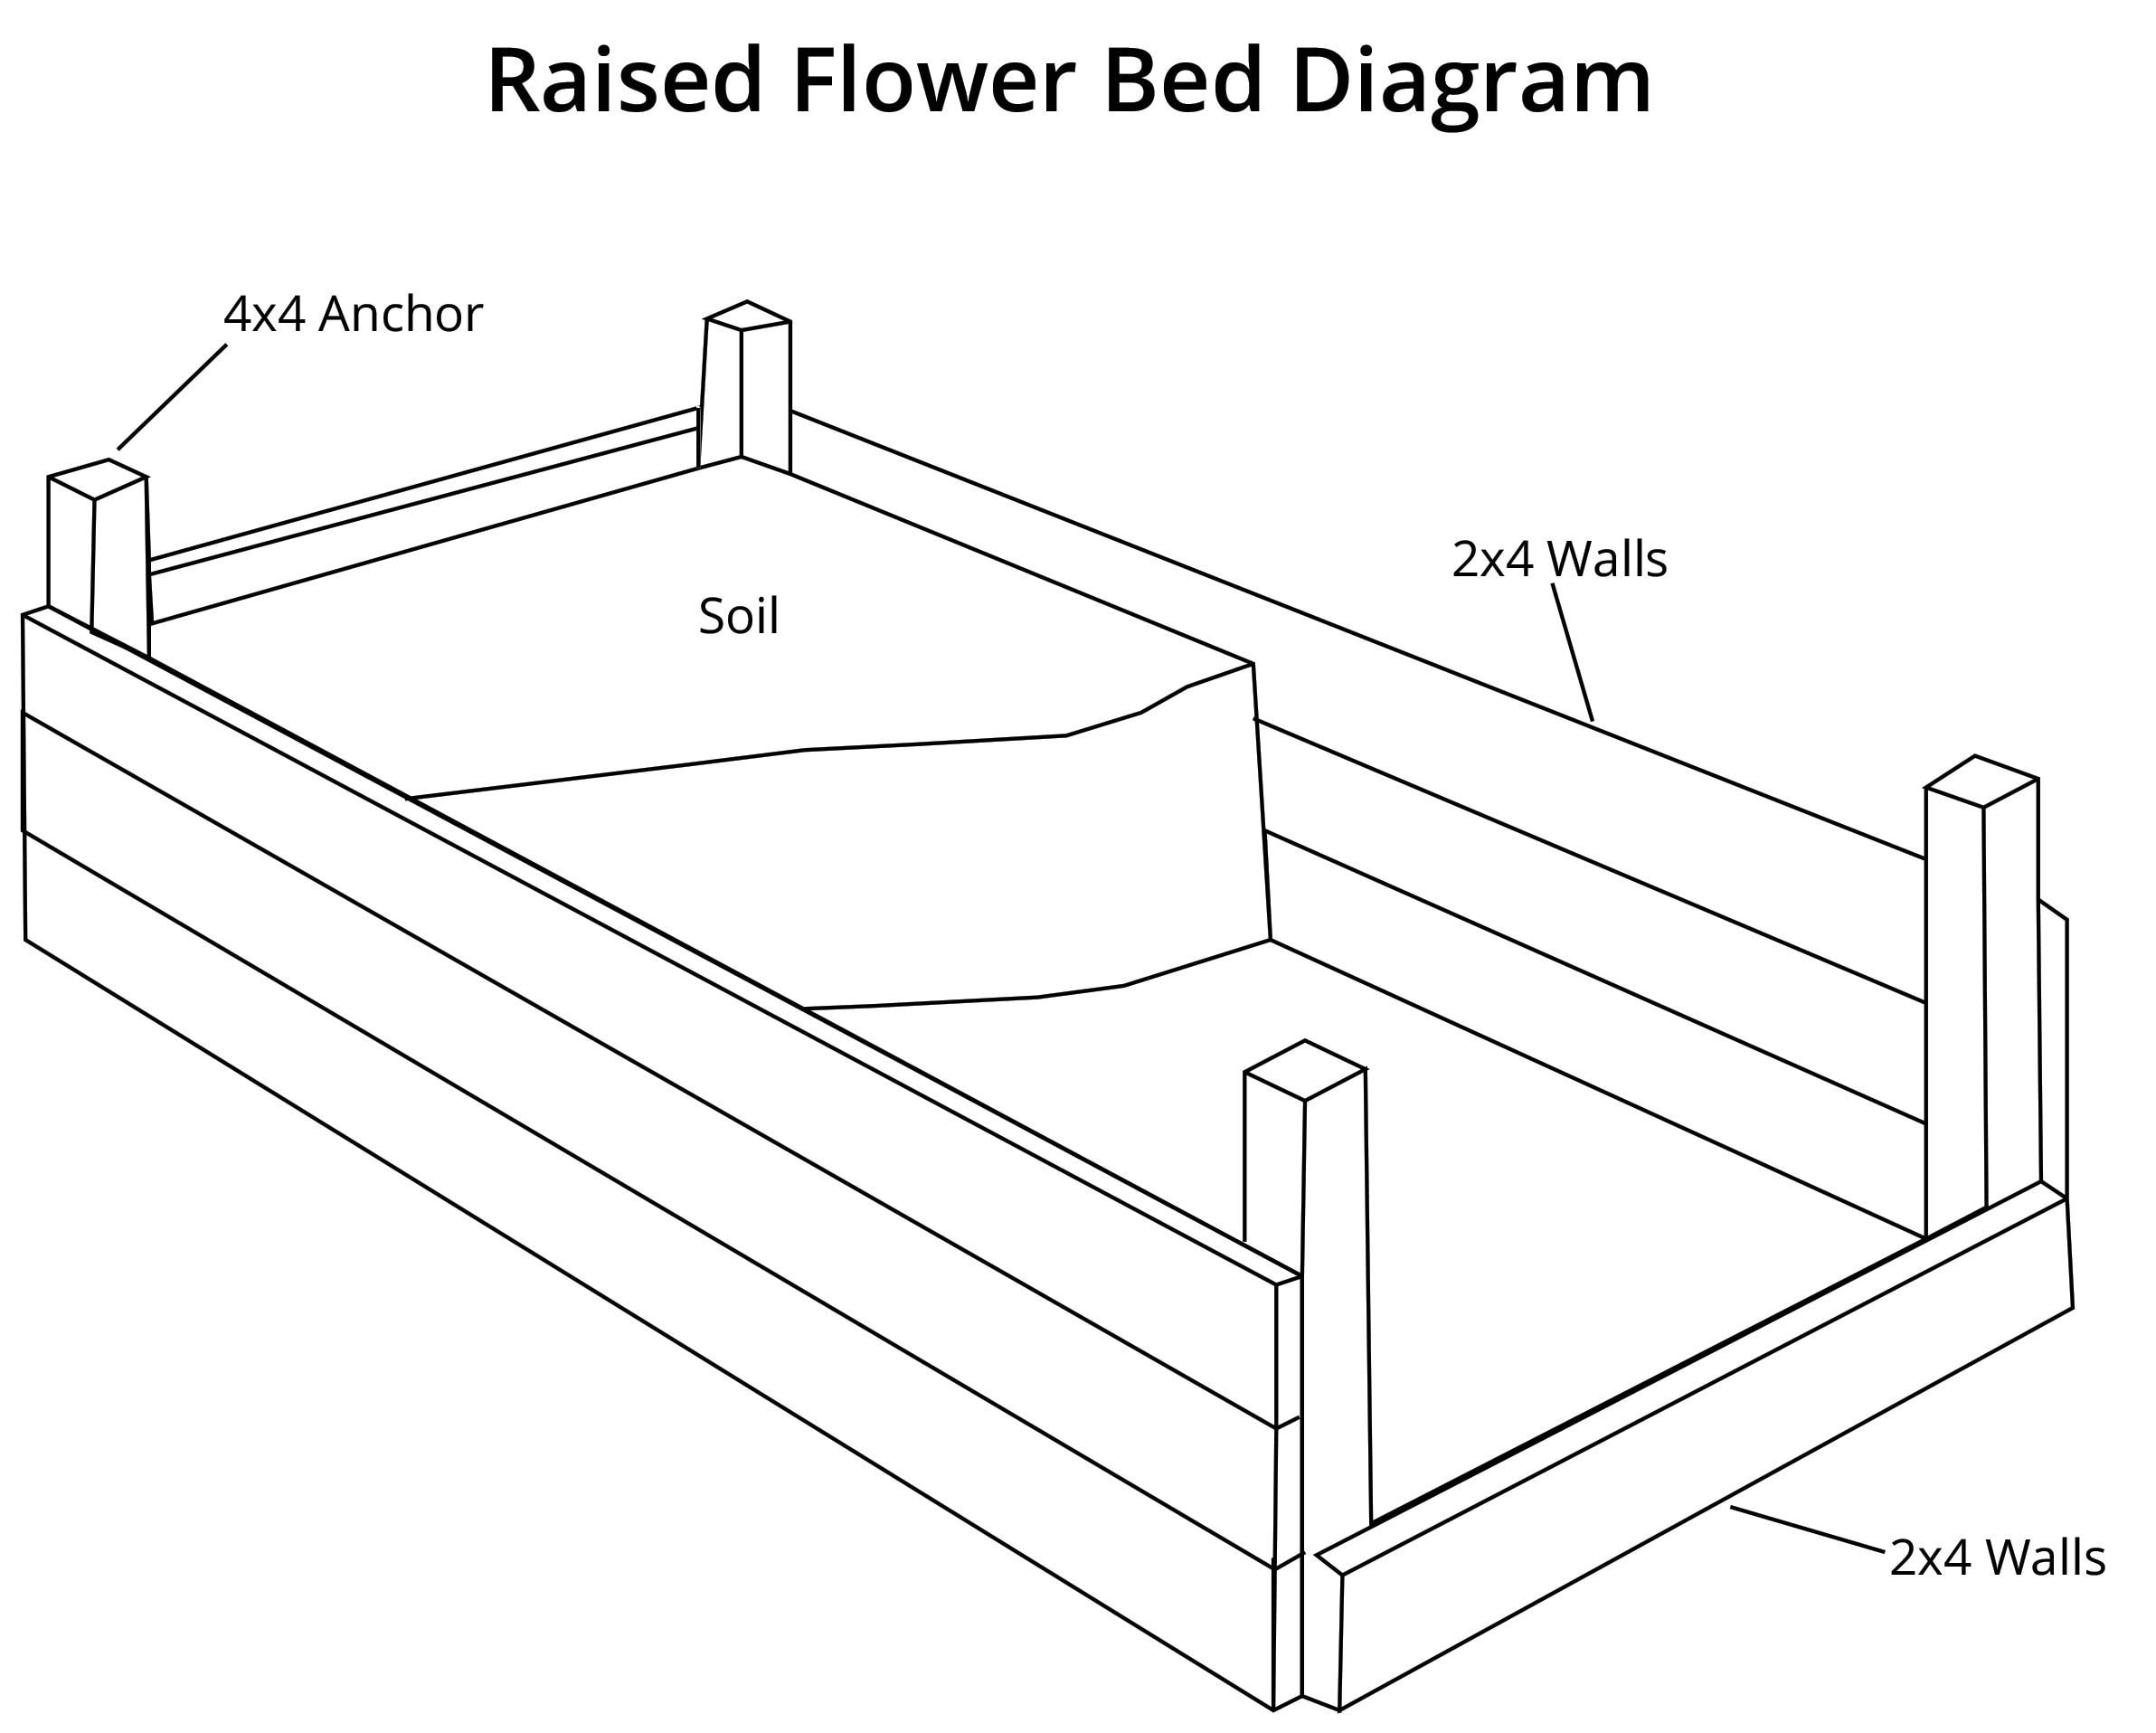
*Note: The 2x4s are used as the walls of the bed and the 4x4s will be used to anchor the bed and hold the walls together, as visible in the example diagram above. You can look up a parts list with the proper dimensions to match the size of bed that works best for you. Just bring this list into your local home improvement store to cut all your 2x4s and 4x4s to the needed sizes for your bed, free of cost! For larger beds you may want to consider anchoring the bed, but this won’t be necessary for smaller beds.
Step 1:
Using four wooden lawn stakes, mark the dimensions of the container in your lawn where you wish to place the garden bed. Using a square shovel, remove the layer of grass within the marked areas. Once the grass is removed, use the level tool to make sure it’s flat. Once this is complete, lay the landscaping fabric over the planting bed area, enough so that it’s a little larger than the area.
Step 2:
Now let’s construct the box. With a pencil, mark the spots where you will drill in your 2x4s. Then, drill pilot holes in all of your 2x4s to make screwing in your deck screws a breeze. Let’s start with a wall of your bed by securing some 2x4s to a 4x4. To ensure it’s even, use your square rafter tool. Now screw the boards together, proceed to do the same process on the opposite end to complete the first wall. Complete this process again until you have two walls, at which point you can secure your remaining 2x4s at the ends of each wall to complete the box. Refer to the diagram above as a guide.
Step 3:
Once your box is complete, proceed to lay it on top of your planting bed area. Ensure that it’s level by using your level tool. Once set, use your utility knife to cut the excess landscape fabric around your box. Now you are ready to fill your box with soil, mixing compost and fertilizer in with the soil to help your garden flourish.
Step 4:
At this point you can proceed to plant all your flowers or vegetables of your choice! To do so, simply pull the dirt back and put the plant in place and proceed to pack the roots down with soil. Then snake your soaker hose throughout the garden in order to execute efficient irrigation. You can even attach the soaker hose to a timer in an effort to conserve water.
Now your raised garden bed should be complete! We would love to see your photos, send your completed raised flower bed photos to help@taskeasy.com.
